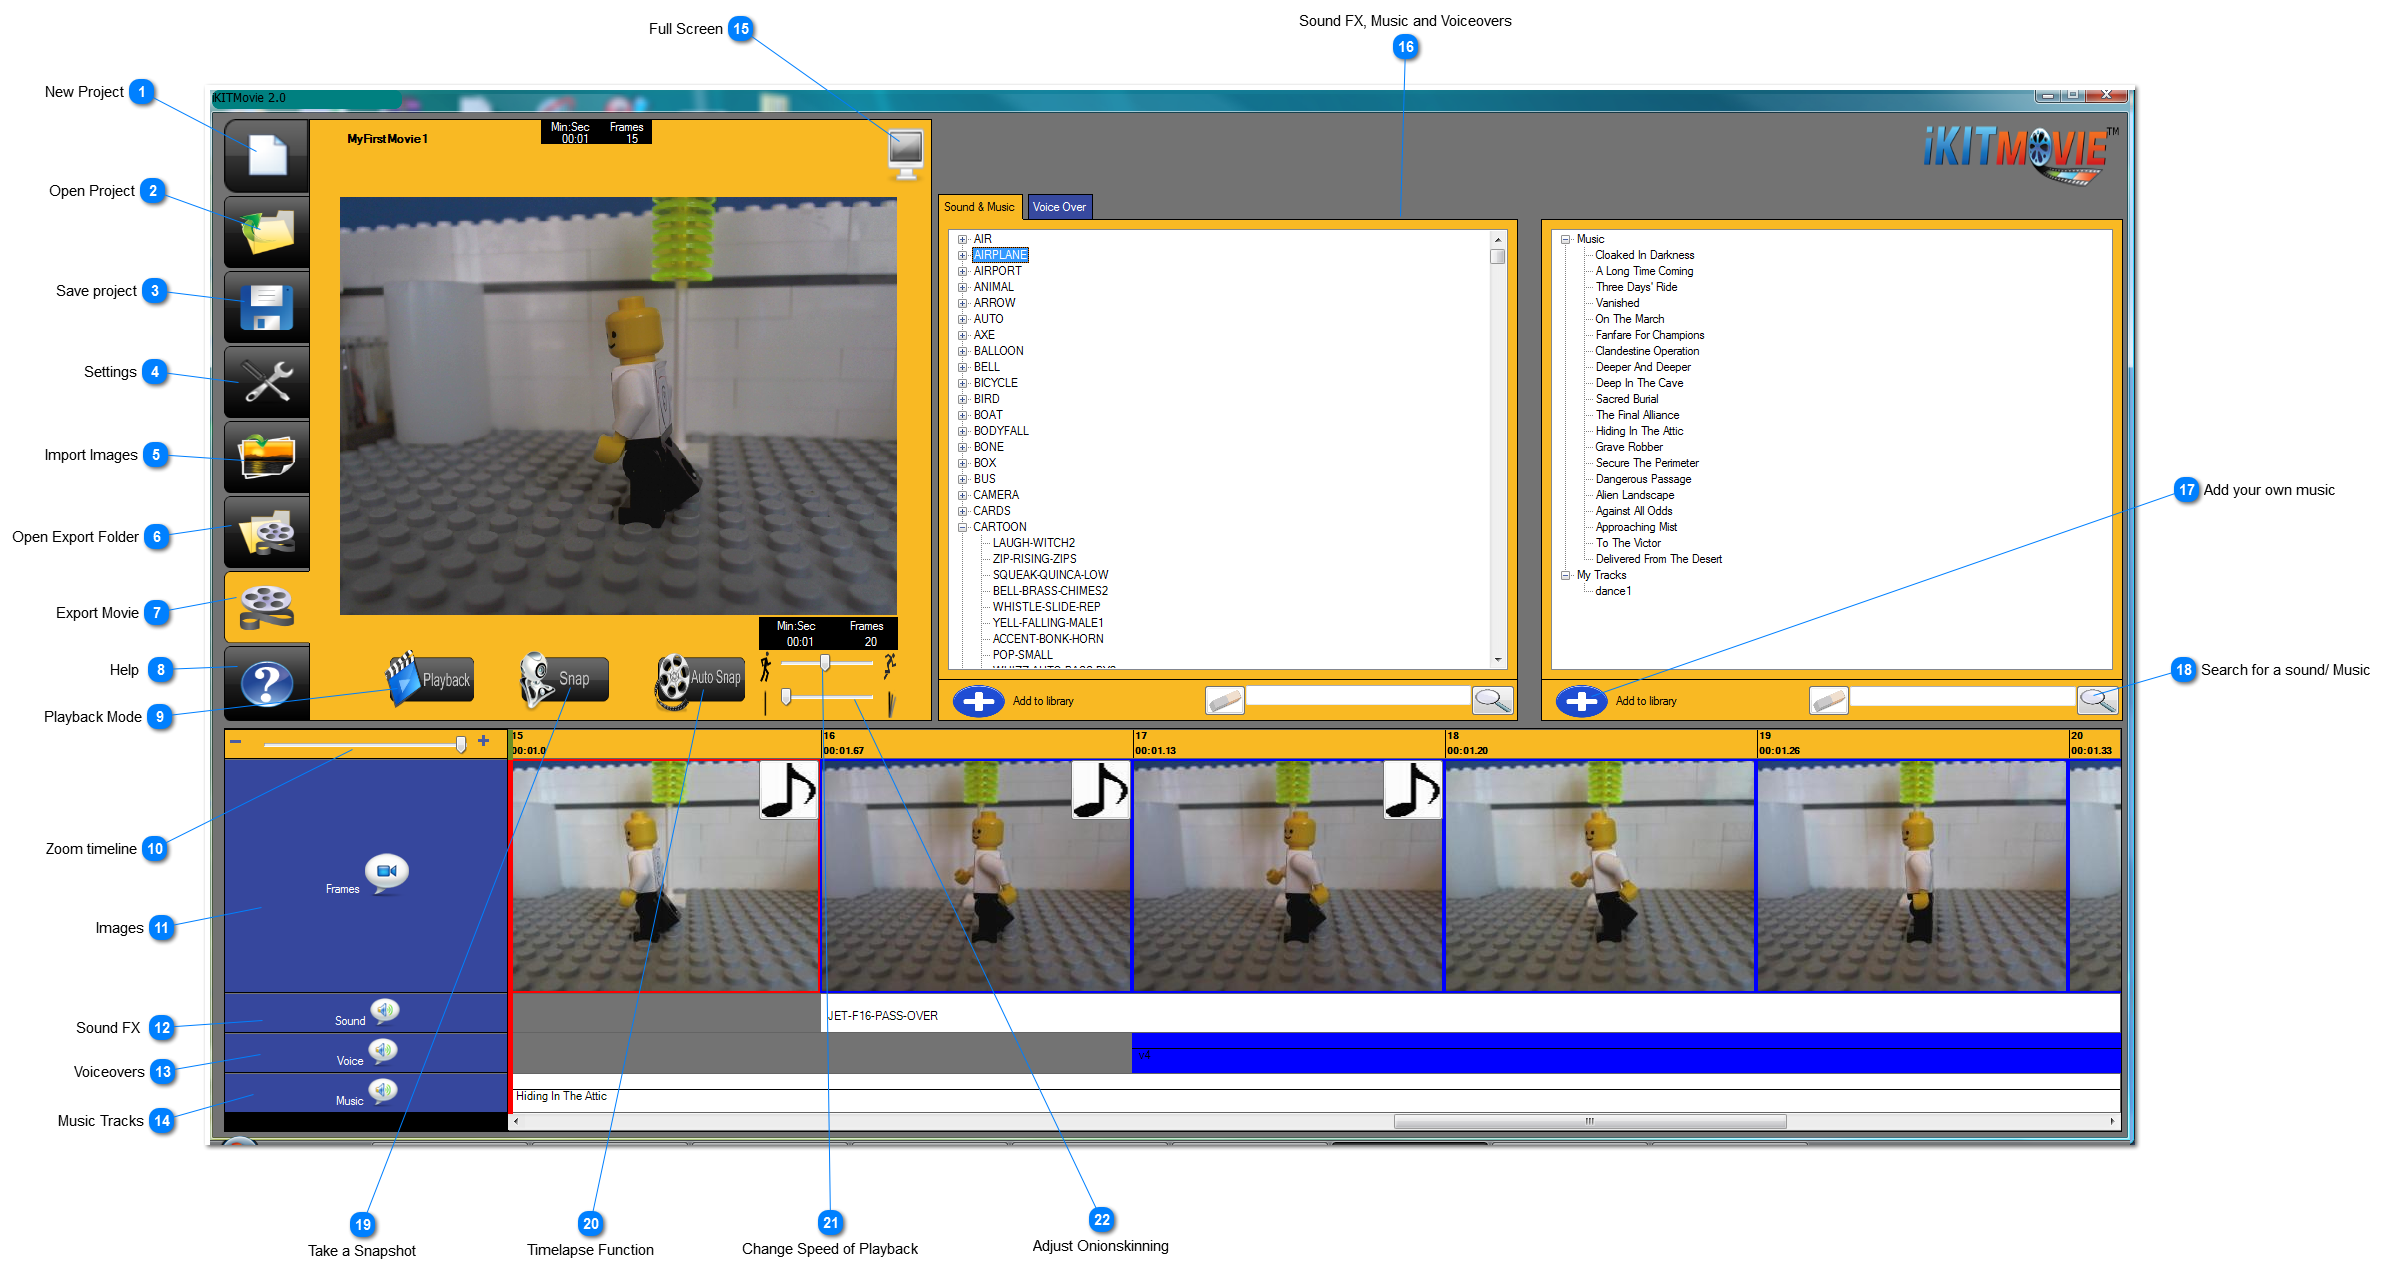
Click on the blue buttons to learn about each item of the iKITMovie Screen
 New Project
 Click on this button to create a new project. If you have a project open already, you will be
prompted to save it first.
|
|
 Open Project
 Open one of your existing projects. iKITMovie files will have a file extension of ".ikit" -
Do not try to open non ikit files.
|
|
 Save project
 Click this button to save your project. You should get into the habit of saving your project
regularly while you work on it.
|
|
 Settings
 Choose to set various project settings by clicking on this button.
|
|
 Import Images
 You can import images into your project at any point. iKITMovie supports JPEG files.
|
|
 Open Export Folder
 Open the folder where your exported movie has been created.
|
|
 Export Movie
 Use this option once you have completed your project to create a movie that can be
viewed outside of iKIT.
|
|
 Help
 Click on this button to bring up this help file.
|
|
 Playback Mode
 Go from capturing images to viewing them in iKIT
|
|
 Zoom timeline
 Use the zoom control to fit more of your captured images
onto your screen to make it easier to edit and plan your movie.
|
|
 Images
 This row contains all the images you have in your project shown in a timeline fashion.
|
|
 Sound FX
 This row contains all the sound fx you have added to your project.
|
|
 Voiceovers
This row contains all the voice over tracks you have added to your project.
|
|
 Music Tracks
This row contains all the music tracks you have added to your project.
|
|
 Full Screen
 Click on the full screen button to fill your screen with the live preview and playback image.
|
|
 Sound FX, Music and Voiceovers
 This section of the screen shows the sound fx, music tracks and voiceovers available
to you for your project.
|
|
 Add your own music
 You can add your own music tracks to your database of sounds. You can add WAV or MP3 files.
They will be imported in to "My Sounds" in the listing.
|
|
 Search for a sound/ Music
 Type in a keyword to find the sound you are looking for in your listings.
|
|
 Take a Snapshot
 This button you will use most when using a webcamera. Click on it to take a photograph / snapshot of the
image in front of your connected webcamera.
|
|
 Timelapse Function
 This button allows you to take snapshots at regular intervals. It's a timelapse function.
|
|
 Change Speed of Playback
 Here you can alter the speed at which your movie plays back onscreen. It can
be set to anything from 1 to 30 Frames per second ( FPS )
|
|
 Adjust Onionskinning
 This is a very useful tool for stop motion animation. It shows you the difference
between the last snapshot you took and the current live position of your character onscreen.
|
|